Sabtu, 16 Oktober 2010

Bermasalah dengan Jempol di Facebook..????


Ada ribuan grup yang dapat bergabung atau hanya seperti di FaceBook. Hal ini dapat menyenangkan untuk klik "Like" tombol sehingga menambah hal-hal ke profil Anda. Masalahnya adalah, Anda dapat berakhir dengan ratusan kelompok hal-hal yang Anda suka pada satu waktu atau yang lain. Hal-hal tidak selalu berlaku dalam kehidupan Anda sekalipun.

Jika Anda ingin orang tahu apa yang Anda benar-benar suka, Anda mungkin ingin menghapus beberapa dari kelompok-kelompok dari halaman FaceBook Anda. Hal ini bisa menjadi tugas yang membosankan, tetapi jika Anda ingin membersihkan jalan bagi lebih suka atau hanya untuk membersihkan halaman, Anda dapat melakukannya dengan sangat mudah.

Bagaimana menghapus "Likes" pada halaman FaceBook Anda:

Langkah 1 : Masuk ke account FaceBook Anda dan pergi ke halaman profil Anda.

Langkah 2 : Gulir ke bawah halaman dan melihat di sisi kiri untuk kotak "Likes".

Langkah 3 : Ini akan memberitahu Anda berapa banyak "suka" yang Anda miliki dan akan ada tiga contoh di bawah pos.

Langkah 4 : Jika Anda melihat "Like" ada yang ingin Anda melihat menghilang, klik di atasnya.

Langkah 5 : Gulir ke bagian bawah halaman. Di kolom sebelah kiri, Anda akan melihat sebuah "Unlike" tombol. Klik tombol itu.

Langkah 6 : Gulir kembali ke bagian atas halaman dan klik pada tombol "Profil" di bagian atas halaman. Ini akan membawa Anda ke profil Anda sehingga Anda bisa "Like" lebih banyak jika Anda inginkan.

Langkah 7 : Jika Anda ingin menampilkan lebih "suka", Anda dapat melakukannya dengan mengklik jumlah seperti di atas atas tiga contoh yang menunjukkan. Ini akan memunculkan daftar. Anda masih akan harus menghapus "suka" satu per satu, tetapi ini akan memberi Anda berbagai lebih baik "suka" untuk bekerja. Gulir ke bawah daftar. Jika Anda ingin menghapusnya, klik pada link dan "unlike" itu.

FaceBook adalah tempat yang tepat untuk melakukan jejaring sosial Anda. "Like" tombol bisa menjadi banyak kesenangan sampai Anda menyadari bahwa segala sesuatu yang Anda ingin tetap dengan profil Anda selamanya kecuali Anda menghapusnya.

Berhati-hatilah dari apa yang "Like" tombol Anda memilih. Itu muncul di halaman cara Anda satu atau yang lain. Membersihkan "Likes" Anda dan bergerak maju dengan sebuah awal baru. Ketika orang lain melihat Anda suka, mereka menganggap Anda benar-benar menyukainya. Setelah semua, Anda memilih untuk mengklik "Like" tombol di atasnya. Ingatlah bahwa perusahaan di masa depan Anda mungkin melihat halaman FaceBook Anda untuk menentukan jenis majikan Anda akan untuk perusahaan mereka. Bahkan, hubungan potensial dapat bergantung pada semua yang anda lakukan di FaceBook. Jadilah pemilih, ia menghitung.

Jumat, 08 Oktober 2010

Creating Energy Spheres in Photoshop


  1. Download the brush set and install it.
  2. Now I’ll show how to take a child with a big imagination and turn him into the powerful being he imagine himself to be.
  3. We’ll start by creating a new layer on top of our original and filling it with black. Next we want to select Filter >> Render >> Lighting Effects >> Lens Flare
  4. Use the 105mm Prime with the Brightness setting of your choice.
    Lens Flare
  5. This will create a bright flash. Move it to the point where you want the ‘energy ball’ to appear.
  6. You may notice that when you move it, you can see the edges of the layer. To rectify this, select the layer and add a ‘Layer Mask’.
  7. Select default colors (white and black). With the layer mask selected, use the Gradient Tool >> Radial Gradient >> Reverse and drag from the center outwards. This will mask everything in a sphere around the center.
  8. Set both of these layers to the ‘Hard Light’ setting.
  9. I like to use the Image >> Adjustments >> Photo Filter to make the colors “pop”. I also used this setting to make the lens flare a bluish color. There are other ways to do this so experiment with your options.
  10. Using the Brush set we installed earlier we want to apply them to the energy balls. I used the color black, with the layer’s Blend Options set to ‘Overlay’.
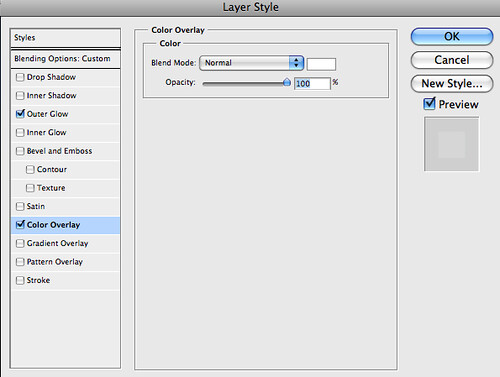
  11. With this layer selected, set the Layer Style settings like so:
  12. Using the same technique that we used in Step 7, we want to mask the edges of our brush layers.
  13. To create the ‘arc of light’ we’ll use paths. Select the ‘Ellipse Tool’ and change it from ‘Shape layers’ to ‘Paths’. Now, draw a large circle or ellipse that includes both energy flares.
  14. Once the arc is drawn we want to stroke it (no jokes please). Select a brush that’s very small, maybe about a brush with a 5px diameter and use the color white. Go to ‘Paths’ right click on the selected path, and select ‘Stroke Path’. Check the ‘simulate pressure’ option, this will give the ring a bit of perspective with a heavier stroke on one side and a lighter stroke on the opposite side.
  15. Repeat this step twice. Each time use a different brush setting that is bigger than the one before it. I started with the 5px brush, then I used a 45px brush followed by a 100px brush. Each time use a different color. The topmost (bigger) arc should be set to ‘Linear Dodge (Add)’ with an opacity of 35%. The middle layer should be set to ‘Overlay’ and the original (the white one) should be set to ‘Linear Dodge (Add)’.
  16. I grouped these together then, using the technique from Step 7 again, I use layer masking to block one half of the sphere I created.
  17. To create the energy ‘tendrils’ that are leaping from the arc. Duplicate the grouped folder from Step 16. Then merge the group or folder into one layer. Select Filter >> Liquify and distort the arc to look like it should for your image. Secondly, we’ll select Filter >> Distort >> Ripple and tweak it to look a bit more like electricity.
  18. Now we’re done. Outside of some techniques that I used to make the image more polished, this completes the tutorial.

Design a Stunning Sneaker Advert

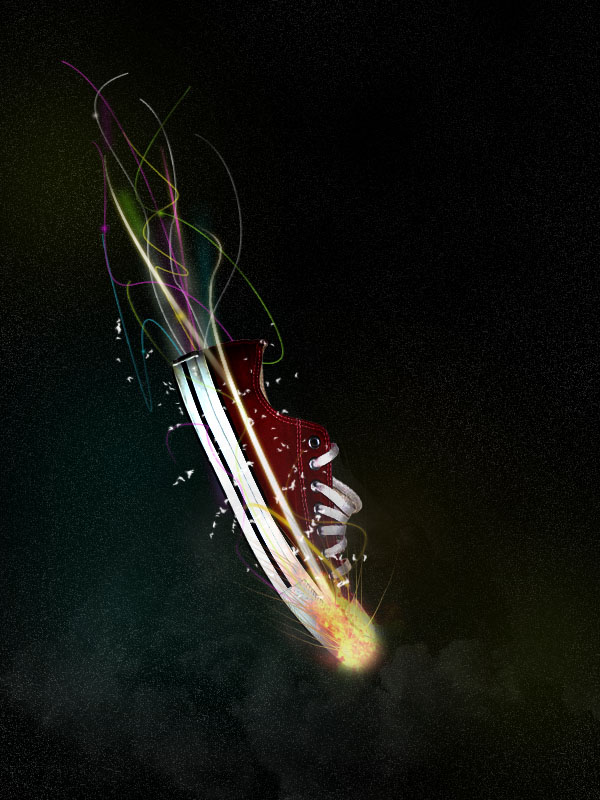
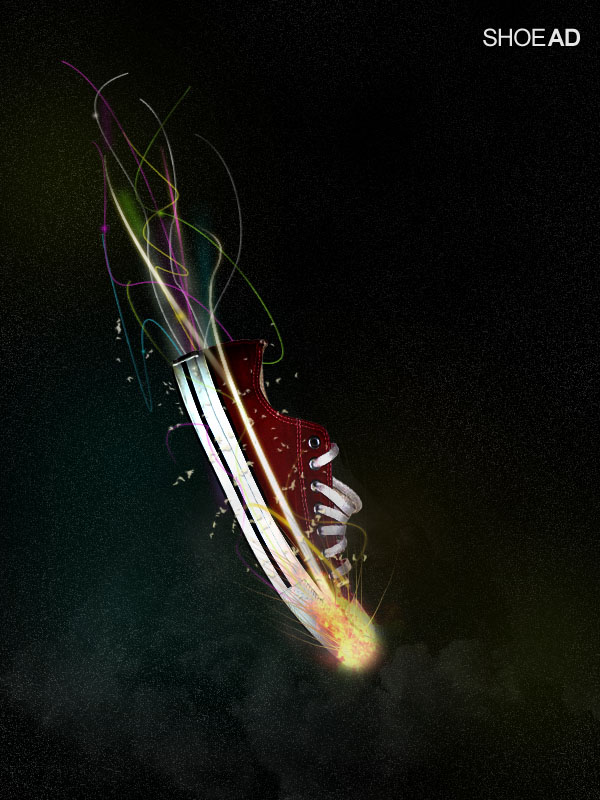
Final Image

This is the final image we’ll be creating. This image is inspired by the incredible works of Peter Jaworowski.
shoefinal Design a Stunning Sneaker Advert

Images Used

Red Sneaker Photo
Clouds
Flame

Step 1

Open up a new document (600X800px) and create a new layer called ‘background’. Fill your canvas with a linear gradient ranging from 3B3B3B to 595959.
shoe1 Design a Stunning Sneaker Advert

Step 2

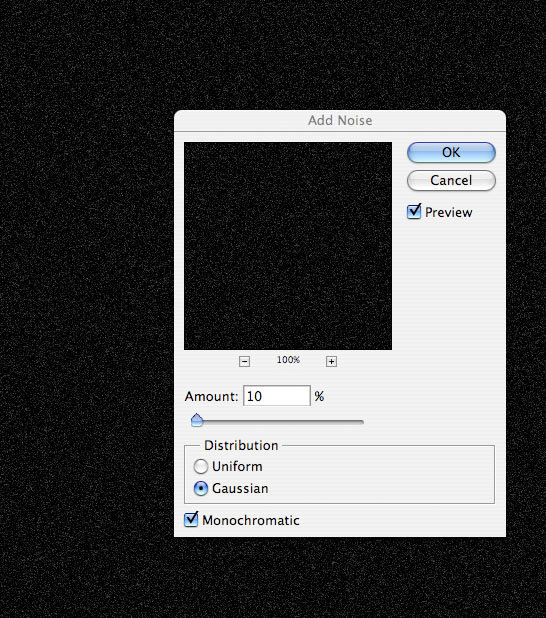
Now create a new layer called ’stars’. Fill your canvas with black, and then go to filter>noise>add noise. Make your settings 10%, Gaussian, Monochromatic.
shoe2 Design a Stunning Sneaker Advert

Step 3

Now go to image>adjustments>brightness/contrast and increase your contrast to +30. Then change this layer’s blend mode to ‘multiply’.

shoe3 Design a Stunning Sneaker Advert

Step 4

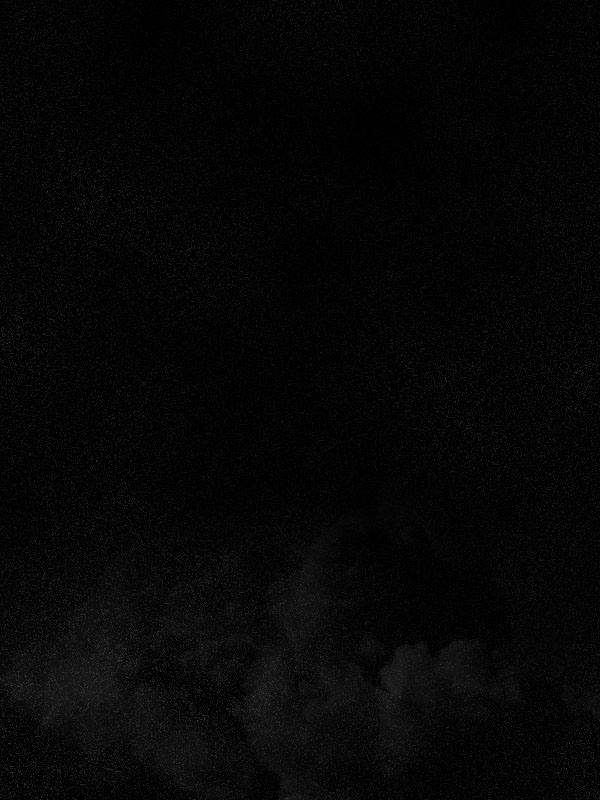
Now create a new layer called ‘cloud render’. Go to filter>render>clouds. Then change your layer’s blend mode to ‘overlay’. This should give random patches of light to your image.

shoe4 Design a Stunning Sneaker Advert

Step 5

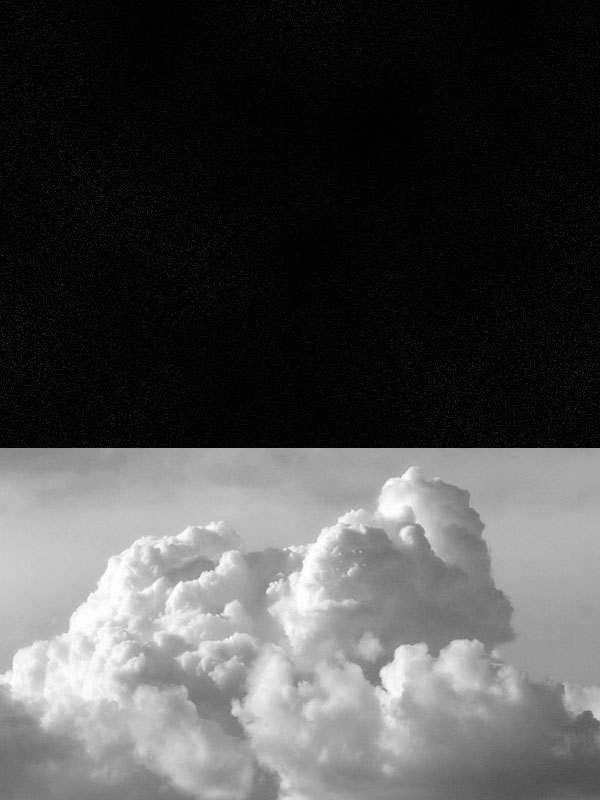
Now paste in a photo of some clouds into the bottom of your canvas. Go to image>adjustments>desaturate to grayscale your clouds, and then use a large, soft eraser brush to brush away the top of your cloud photo. Change your layer blend mode to ‘hard light’ and reduce your layer opacity to 10%.
shoe5a Design a Stunning Sneaker Advert
shoe5b Design a Stunning Sneaker Advert

Step 6

Now create a new layer called ‘color marks’. Use a very large, soft paintbrush to paint brightly colored marks over your canvas. Then reduce this layer’s opacity to 7%.
shoe6a Design a Stunning Sneaker Advert
shoe6b Design a Stunning Sneaker Advert

Step 7

Now paste in a photo of a shoe. Go to edit>transform>rotate and rotate/scale it to fit nicely in the center of your canvas.
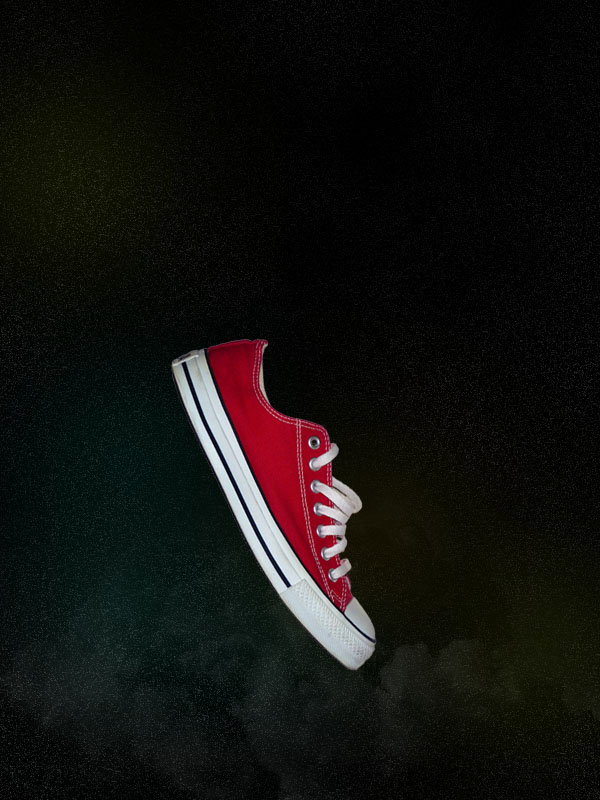
shoe7 Design a Stunning Sneaker Advert

Step 8

Now go to image>adjustments>hue/saturation and reduce your saturation to -25.
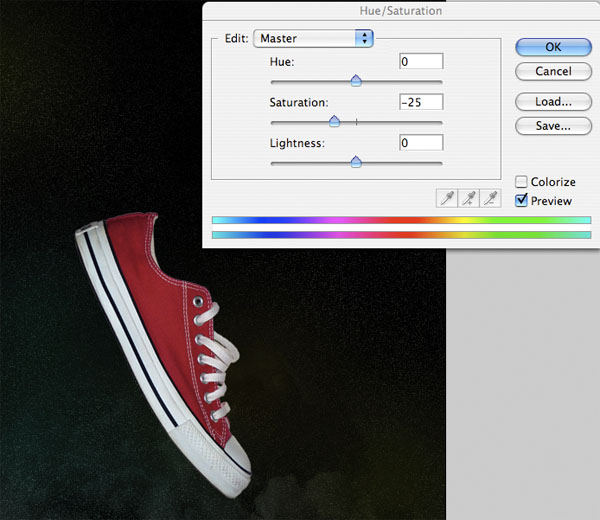
shoe8 Design a Stunning Sneaker Advert

Step 9

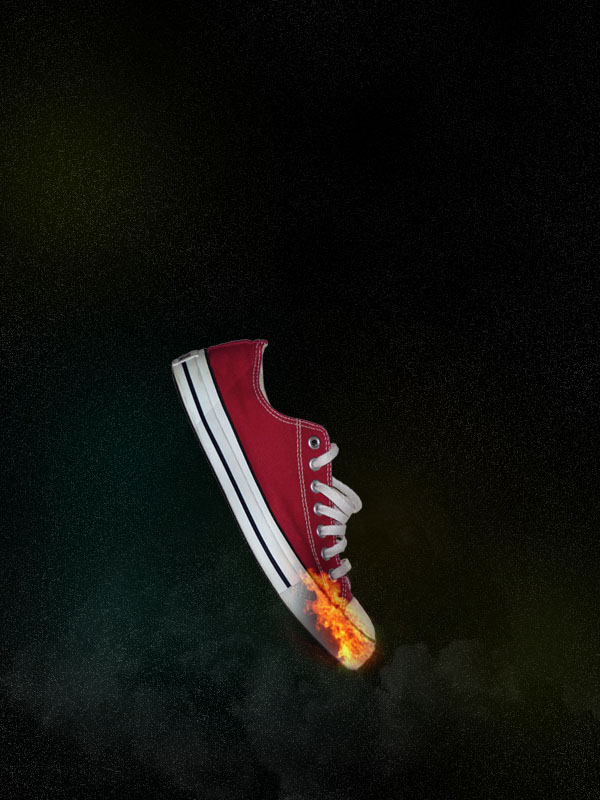
Now paste in an image of some flames onto a new top layer. Then resize/rotate your image to fit over the toe of your shoe. Use a soft eraser brush to make the flames fit the shoe better. Duplicate your flame layer 3 times to make the flames more intense, and then merge down so that you have just one flame layer.
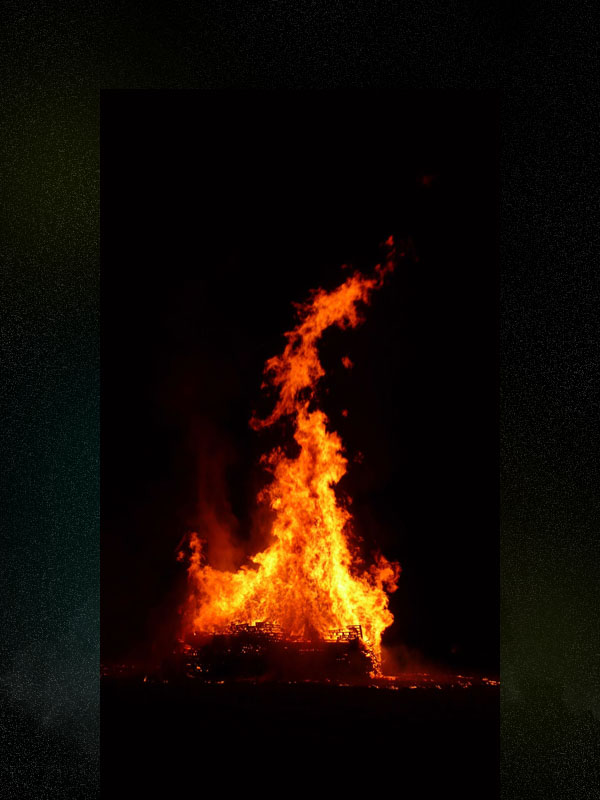
shoe9a Design a Stunning Sneaker Advert
shoe9b Design a Stunning Sneaker Advert

Step 10

I want to make my flames more intense, so I go to image>adjustments>brightness/contrast and up the brightness to +100. To make the flames more intense again, duplicate your flames 3 more times, and merge down to one flame layer. Keep using your soft eraser brush to tidy things up.
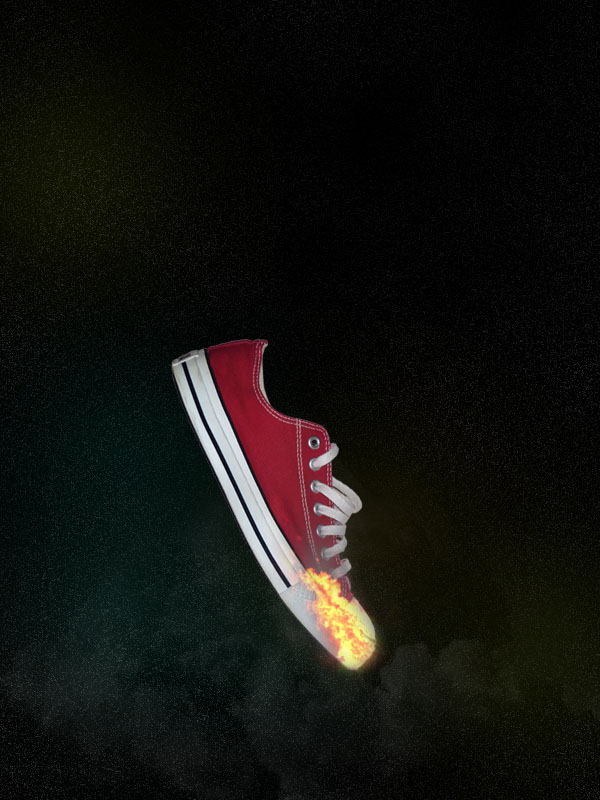
shoe10 Design a Stunning Sneaker Advert

Step 11

Now select a 60px white paintbrush, 0% hardness. Paint a white spot over the base of your flames. Then reduce your layer opacity to 40%. This should create a more intense light source at the base of your flames.
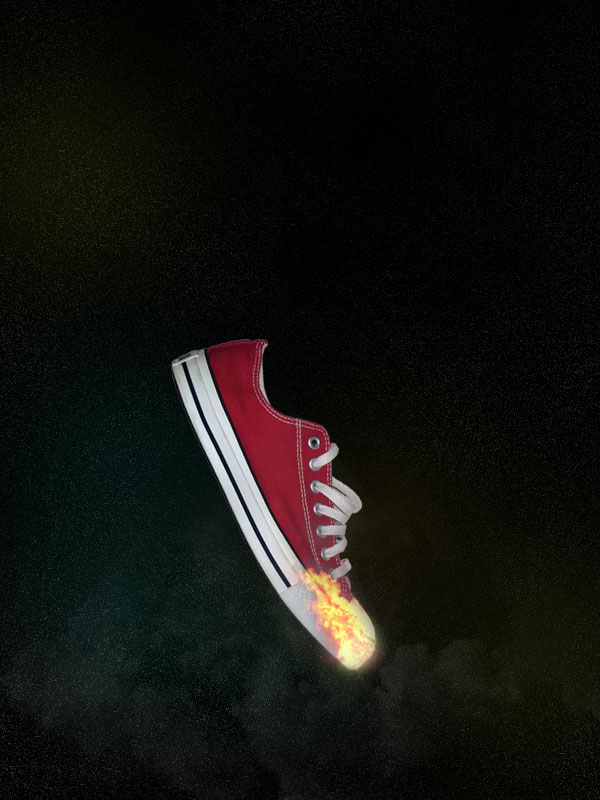
shoe11 Design a Stunning Sneaker Advert

Step 12

Now grab your smudge tool, and set it’s strength to 95%. Select your flame layer, and smudge out parts of your flame, using a 1px brush. Try to smudge these lines upwards over your shoe.
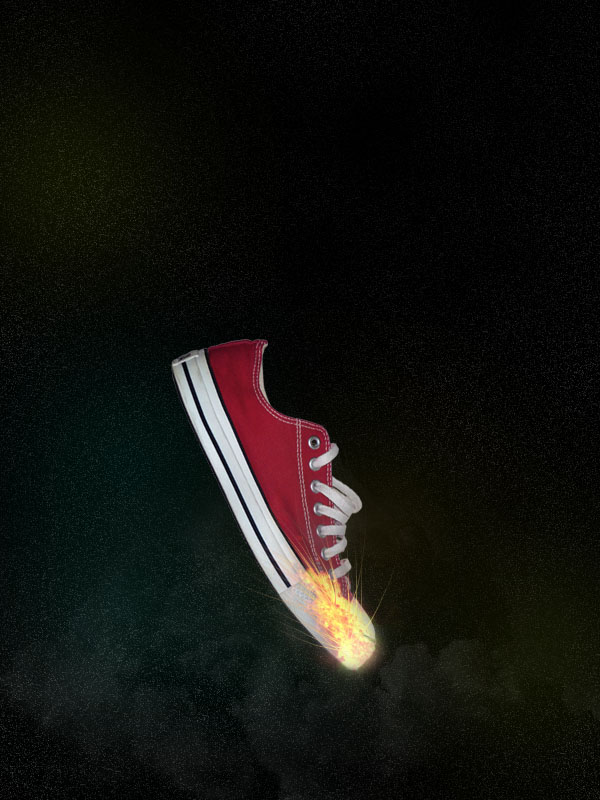
shoe12 Design a Stunning Sneaker Advert

Step 13

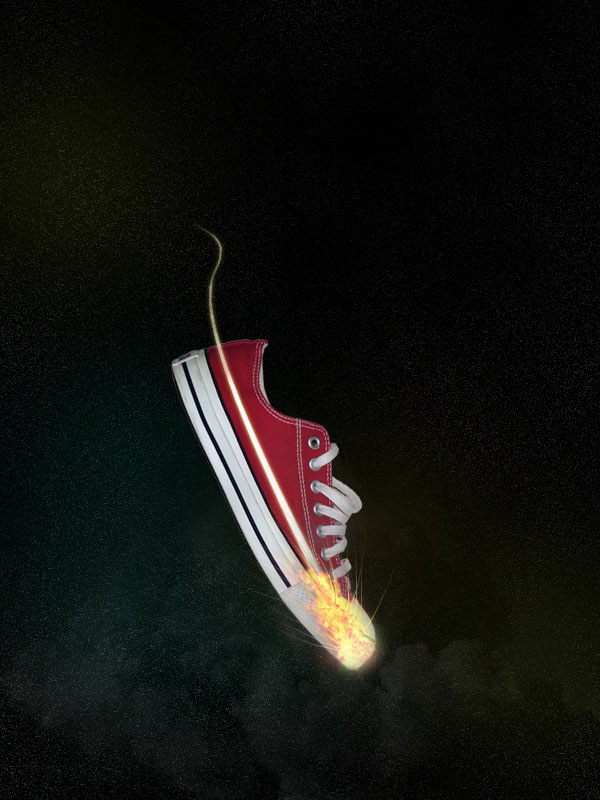
Now create a new layer beneath your flame and white spot layers called ‘white line’. Draw a wavy path line using your path tool, and then with a 4px white paintbrush selected, select your path tool, right click on your path line and click ’stroke path’. Once your path line has been stroked right click on it again and click ‘delete path’. This should just leave a white line.
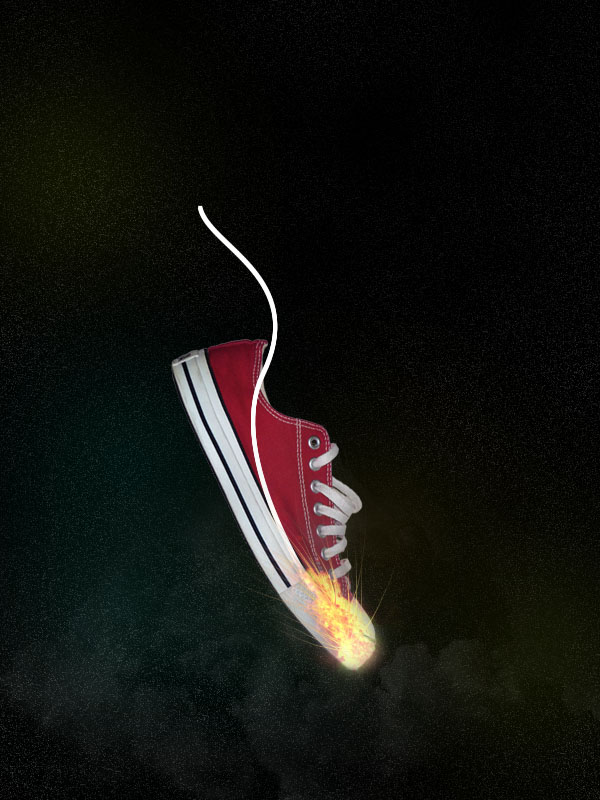
shoe13 Design a Stunning Sneaker Advert

Step 14

Go to edit>transform>skew and reduce the width of the top of this white line. Then go to edit>transform>perspective and increase the bottom width of your line shape. This should give the impression that the line is getting thinner/further away from your shoe.
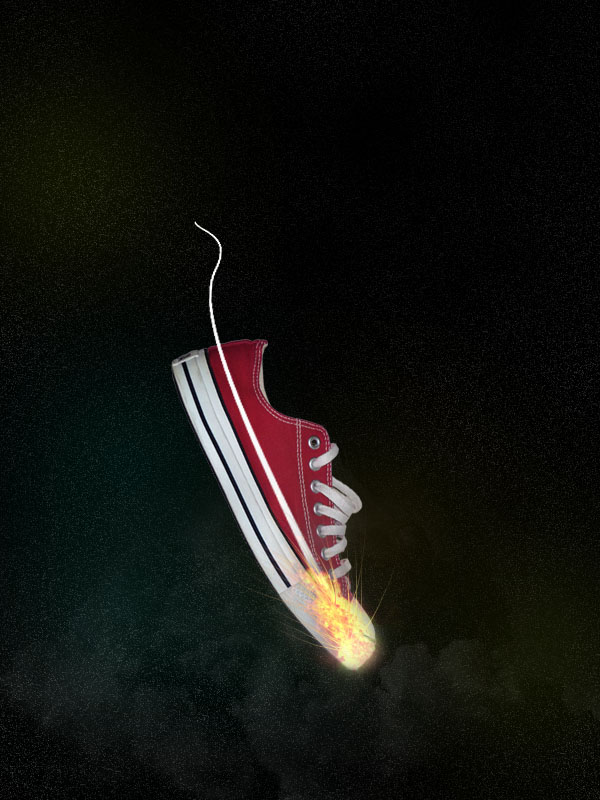
shoe14 Design a Stunning Sneaker Advert

Step 15

Go to blending options for your line layer and apply an outer glow effect (settings below).
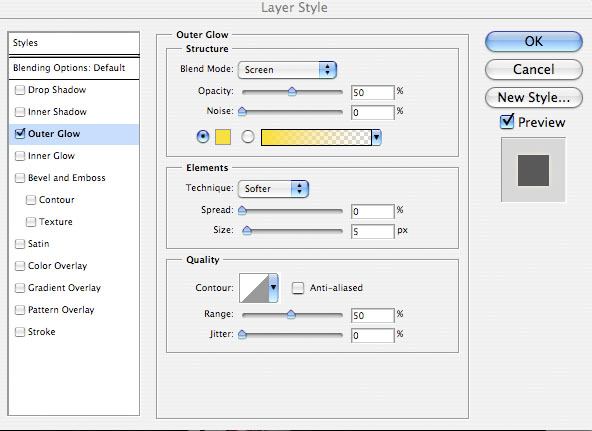
shoe15a Design a Stunning Sneaker Advert
shoe15b Design a Stunning Sneaker Advert

Step 16

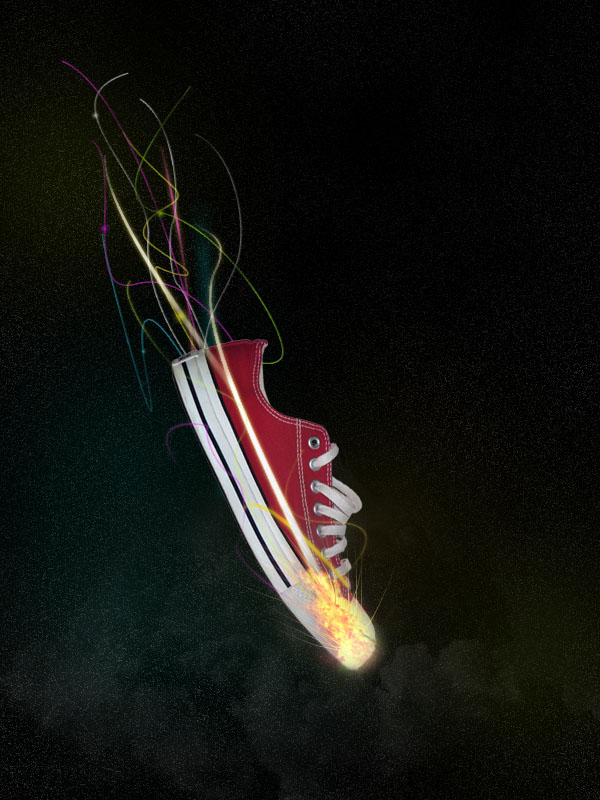
Now apply many more lines, of varying thicknesses and colors. Make sure that some of them are below your shoe layer and some go above it. To apply the same outer glow to your lines, right click on your original line in your layers palette and click ‘copy layer style’. Then right click on your new line layers and click ‘paste layer style’.
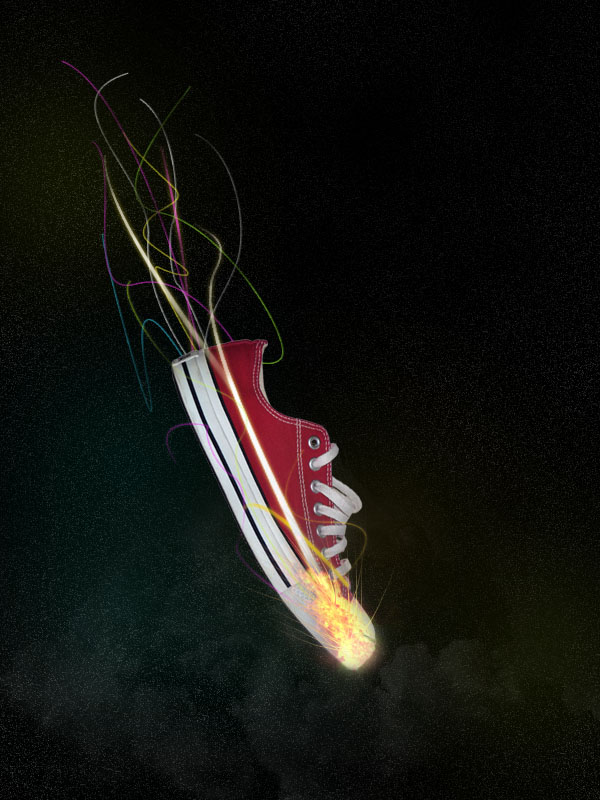
shoe16 Design a Stunning Sneaker Advert

Step 17

Select your radial gradient tool, and apply tiny ‘light spots’ using the radial gradient effect. Try to make each light spot to the color of the line which it goes over.
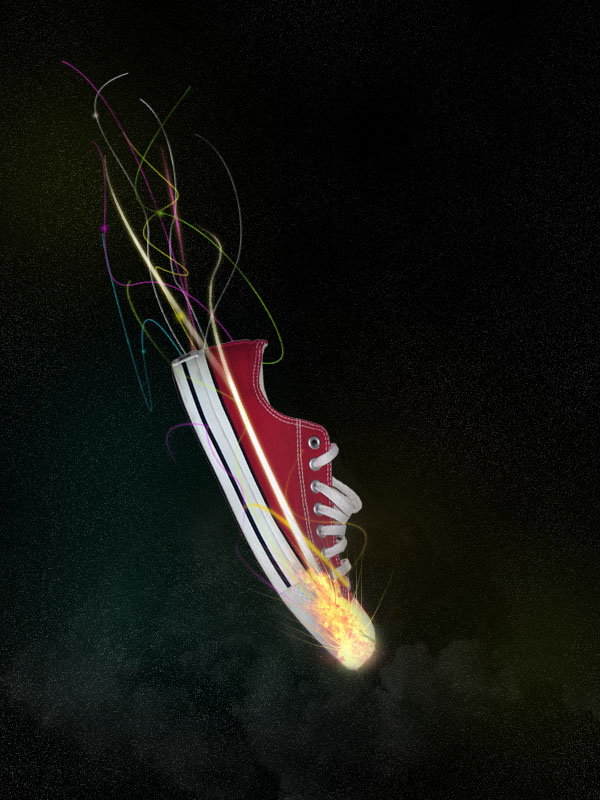
shoe17 Design a Stunning Sneaker Advert

Step 18

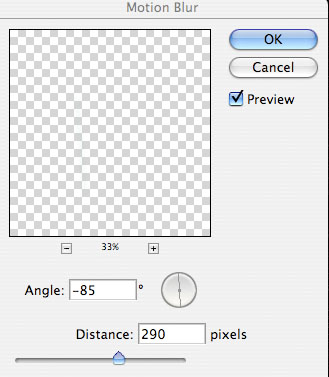
Now create a slightly larger light spot behind your shoe. Go to filter>blur>motion blur and blur the light spot upwards. Then dulicate this layer 3 times to make it more obvious, and merge down to one layer.
shoe18a Design a Stunning Sneaker Advert
shoe18b Design a Stunning Sneaker Advert

Step 19

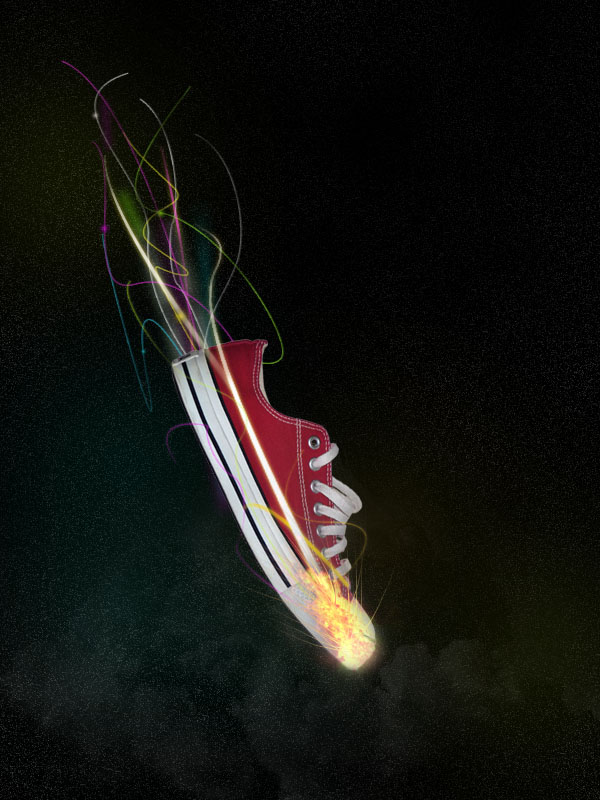
Add several more blurred light lines.
shoe19 Design a Stunning Sneaker Advert

Step 20

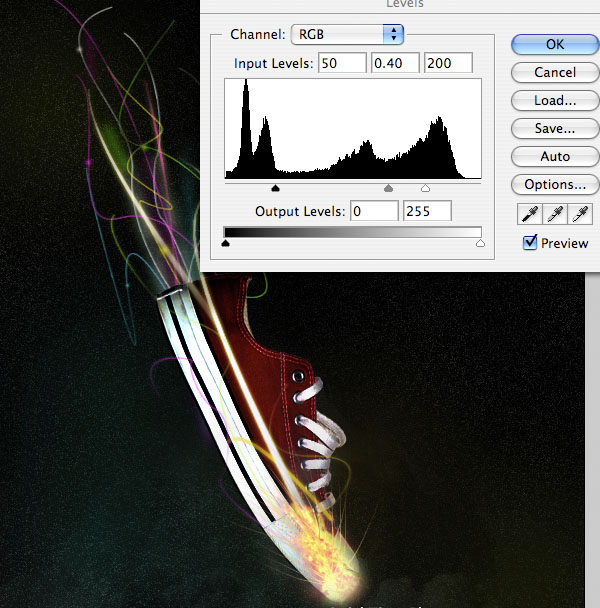
Select your shoe layer and go to image>adjustments>levels. Then apply the settings shown below. This should give your shoe photo a lot more intensity, enhancing the shadows.
shoe20 Design a Stunning Sneaker Advert

Step 21

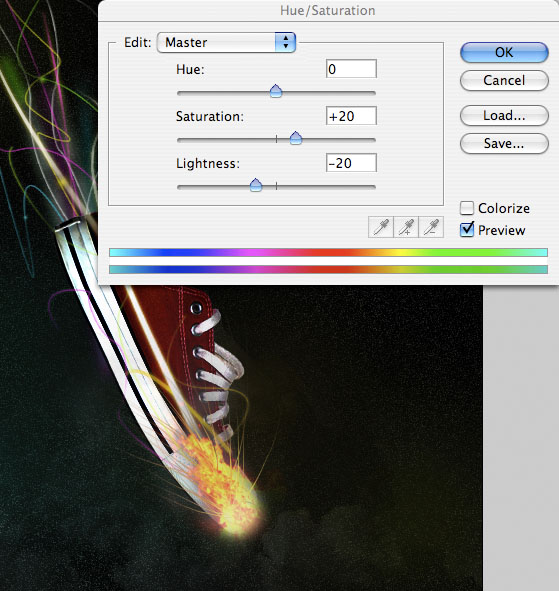
Now duplicate your flame layer and merge down to one layer. Then go to image>adjustments>hue/saturation and up the contrast to +20 and reduce the lightness to -20. Finally, use your soft eraser brush to brush away the top of the flames a little.
shoe21 Design a Stunning Sneaker Advert

Step 22

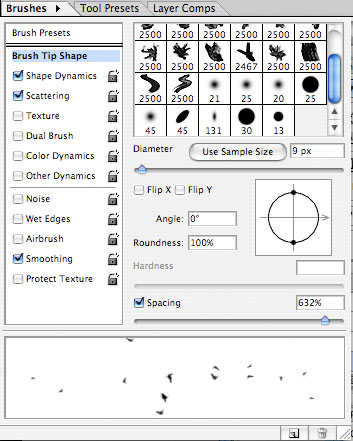
Now grab a watercolor brush, and apply the brush settings shown below. Then paint white brush marks over your shoe, to create a scattered effect.
shoe22a Design a Stunning Sneaker Advert
shoe22b Design a Stunning Sneaker Advert
shoe22c Design a Stunning Sneaker Advert
shoe22d Design a Stunning Sneaker Advert

Step 23

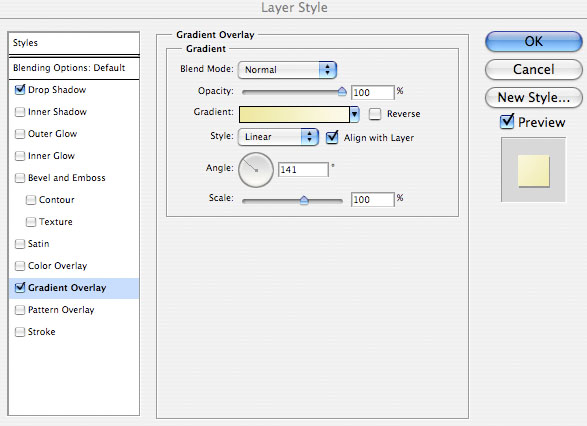
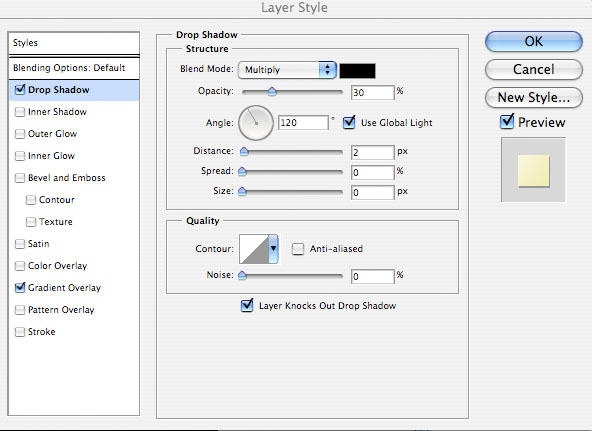
Go to blending options for your brush strokes layer and apply a gradient overlay and drop shadow effect.
shoe23a Design a Stunning Sneaker Advert
shoe23b Design a Stunning Sneaker Advert
shoe23c Design a Stunning Sneaker Advert

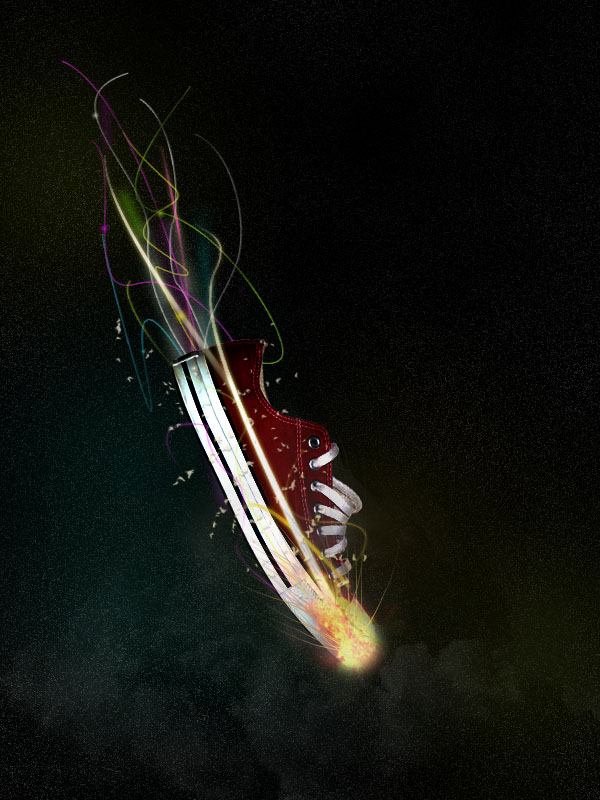
And We’re Done!

To finish up I added some text to the top right of my advert. I really hope that you enjoyed this tutorial, and as always really appreciate your comments.
shoefinal Design a Stunning Sneaker Advert

Electrifying Glow Album Art Electrifying Glow Album Art

Step 1

I took this photo at a show The Killers played at Madison Square Garden in New York this past summer… packed house, great crowd… anyway, here’s the photo. The image is included in the lesson files available for download at the end of the tutorial.
Lets first start by drawing a nice curvy path with the pen tool that we’ll use as our main wrapping glow line. In the Paths palette be sure to rename the path so you don’t loose it when we create a new one.

Step 2

Create a new layer called "First Stroke" and switch to the Brush tool. Choose the 5 pixel round brush with hard edges, set the foreground color to white and click back to the Pen tool. Now simply Right-Click (Mac: Control-Click) anywhere on the path and choose Stroke Path. When the dialog box pops up choose Brush and Simulate Pressure. The pressure simulation will ensure that the stroke tapers off at each end.

Step 3

With your tool of choice remove the sections along the stroke that should be behind your subject. I use the Pen tool.

Step 4

Add an Inner and Outer Glow as shown below. The blue color I’m using in both styles is #6d9bff. This will be the only layer style we’ll be using and we’ll copy and paste this one onto subsequent layers as we go.

Step 5

Duplicate the "First Stroke" layer, clear the layer styles and add a 6px Gaussian Blur. This will add an additional glowing effect around the original stroke.

Step 6

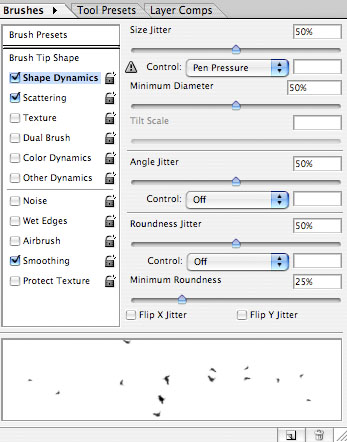
Create a new layer called "Particles", activate the Path we created earlier and switch to the Brush tool. Choose a round brush of 3 pixels with a hardness of 0%, then under the Brushes palette set Shape Dynamics and Scattering to the following. (*note: make sure your foreground color is still white)

Step 7

Switch back to the Pen tool and stroke the path just like before, then remove the overlapping sections. This time the eraser tool will probably be the easiest way to remove the overlapping dots.
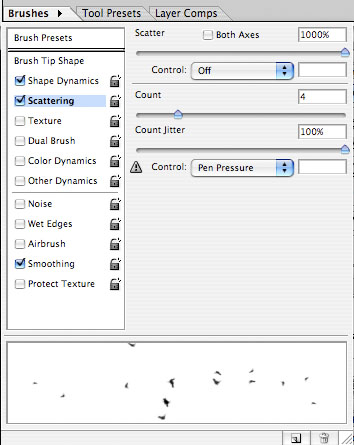
Copy the layer style from the "First Stroke" layer and paste them into the "Particles" layer. (*note: This can be done easily by holding down the Option (PC: Alt) key while clicking and dragging the style icon from one layer to the other.)

Step 8

Create a new layer called "Second Stroke", create a new path similar but not the same as the original with the Pen tool (or duplicate the earlier path and change it a little) then repeat steps 2-5 but this time use a 3 pixel brush and reduce your Gaussian Blur to 3 on the copy layer. Play with a lower opacity on these layers until the effect looks right to you and don’t forget to copy the layer style onto the "Second Stroke" layer.

Step 9

Now that the glow effects have been completed it’s time to really have some fun with this image.
Click on the Background layer and duplicate it by pressing Command-J (PC: Ctrl-J). Choose Image>Adjustments>Threshold from the main menu and use a setting around 85. This will obviously vary depending on your application of the technique.

Step 10

Grab the Magic Wand tool by pressing W and then click anywhere in the field of black. This may not have selected all the black if there are isolated pockets so choose Select>Similar from the main menu to ensure all the black pixels are selected.
Invert the selection by pressing Command-Shift-I (PC: Ctrl-Shift-I) then drag the layer to the trash and select the Background layer. (*note: your selection will still be active.

Step 11

Duplicate the selected area by pressing Command-J (PC: Ctrl-J). This will create a new layer with just the selection copied onto it. Call this layer "Partial".
The selection will be gone and it won’t look like anything has happened, so create a new layer between the "Partial" layer and the "Background" layer, call it "Black" and fill the entire layer with black.

Step 12

Click back to the "Partial" layer and use the eraser to remove all those annoying artifacts outside the artwork that we want to keep.

Step 13

For my finished image I added the graphic as an CD album cover.

GO...BLOG..!!!

Info Fotografi

ilmuGRAFIS.com

Desain Grafis Indonesia